
If you haven’t already seen the before photos of the Happy Camper House, check those out HERE. In order to appreciate my rookie attempt at interior renovation of a vintage camper, you should see where I started.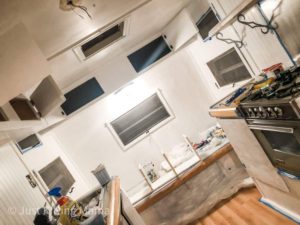
After removing all of the textiles including curtains and cushions, the next thing that needed to be done was to clean and then prime the entire interior, ceiling included, in a mold blocking primer. There is something about knowing that my kids would be sleeping in there for three months straight, that inspired me to make this as safe as I could.
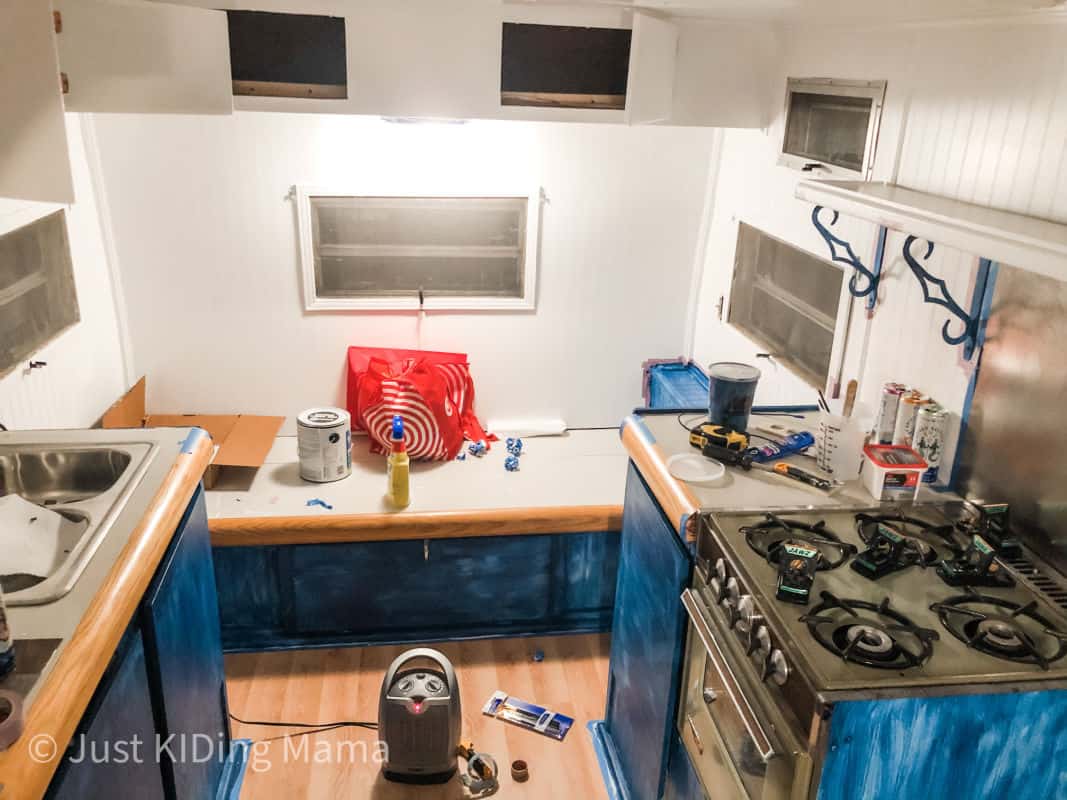
Since I wanted a two tone appearance in the end, I taped off the lower half so that I could begin with the white paint on the top half. Knowing that I wanted the interior to be pretty resilient, I went with a pure white cabinet paint from Sherwin Williams.
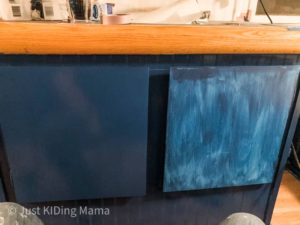
The bottom half I wanted to be a deep, rich navy, and so I chose “Dress Blues” from Sherwin Williams, also in a cabinet grade paint. My big mistake here was not using a tinted primer on the bottom half before I started in with the blue. After three coats of paint, I was still cringing at the “Cookie Monster” blue that had invaded my camper. The fourth coat did the trick, and finally I had the deep blue hue that I had envisioned.
The entire painting process was a bit of a race against time. I learned that the cabinet paint needed to cure for 40 days before it was considered really dry, and resistant to scuffs and dings. If I was going to attempt to live in this with three children, I needed to make sure it had it’s 40 days of rest before the big departure. This meant bringing in space heaters to warm the inside to an acceptable temperature during the frigid winter months. Overall, the painting process took many weeks longer than I had expected.
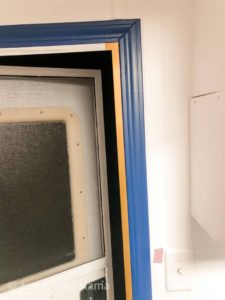 Once the ceiling and walls were freshly painted, it began to highlight some of the other cosmetic defects that would need to be dealt with. The metal framing around the door was scraped up and even a good coat of paint was not going to save it. Replacing the whole door was not in the budget, so thinking outside the box, I ordered a 12 foot roll of permanent adhesive vinyl in a nice matte gold, and cut 2 inch wide strips and wrapped the existing door frame. I was beyond please with how this turned out. I will say I thought there was a good chance I would need to redo this each year, since almost immediately I gouged it a little moving something back into the camper. But even after an entire summer of daily use, there are no additional blemishes, so maybe it was just one unfortunate ding.
Let’s assume this is not the first vintage camper renovation post you have read. If that is the case, then you have been patiently waiting for this moment. It’s time for the “oh shoot” moment of the renovation.
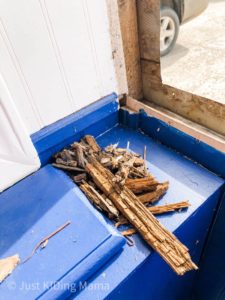 While I was painting the window trim, I decided that the front screen needed to be replaced as well, and the wood inside of the window looked like it could be taking on some mildew. All I wanted to do was replace the wood pieces with a PVC version so that it would not mold and rot when taking on elements from outdoors. As you have guessed, I got a whole lot more than I bargained for.
By a whole lot more, I mean, crumbles of the inner frame. {Cue the ugly tears.} Remember, we are rookies. We purchased an already renovated camper, and I was just adding cosmetic embellishments, or so I thought. Very quickly my husband and father-in-law assured me that it would be ok. They would just remove the window, reframe the entire front of the camper, and put the window back in. {Cue more tears.} 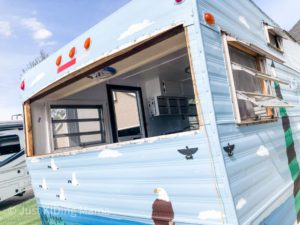
Much to my surprise, they did it! New internal frame, same window, new screen, and they also discovered why my guidelights don’t work – the wires were cut at some point, and did not actually connect to each other. We now know all about butyl tape, and the fact that vintage campers don’t go exactly back together the same once you provide them non-rotted framing. Husband jokes that one way or another that window was coming out – either by choice in the driveway, or involuntarily while we were driving down the road. When all was said and done, I was very pleased how this “oh shoot” moment turned out.
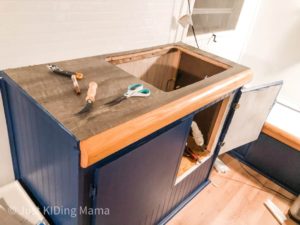 Once we were past the window drama, I continued with the counter top work. Since the previous countertop looked like someone had peeled the veneer off of laminated cabinets and pieced it together as a counter, I wanted something without screw holes and random seams all over. The problem was, none of my handymen wanted to help me cut down a whole sheet of Formica countertop. I’ve never met resistance without a fight, so I put my thinking cap on, and realized that vinyl plank flooring can be cut with scissors. I ended up resurfacing my entire counter with wood grain self adhesive vinyl plank flooring. It turned out amazing. Waterproof, scratch resistant. I’m just not sure I would put anything hot straight on it. Couple this with a new faucet, and BAM – she is lookin’ pretty!
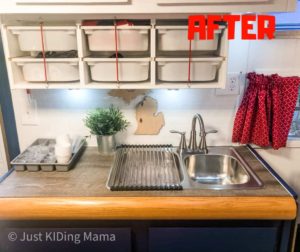
Are you seeing a trend here yet? As I make one thing look pretty, it just shines a light on the next project to be done. It seemed only natural to add a subway tile backsplash to my new pretty awesome kitchen! Smart Tiles to the rescue! Another project where all I needed was a pair of scissors, and a steady hand! There was one seam that didn’t lay quite flat, and all I had to do was add this super light wooden cutout of Michigan to cover, and I was in love all over again. 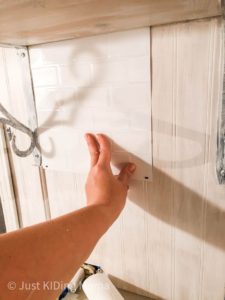
When your husband is 6’ 4”, every vertical inch matters! The previous light fixture was just your basic contractor grade value fixture that you might find in a small bedroom. It did its job, but it also hung about six inches down from the ceiling very near to the entrance of the camper. I also wanted to make the upgrade to using more LED lighting to reduce the heat transfer, and also make it more efficient to move to solar power in the future. When I found this Flush Mount Light at Lowes, I knew it was going to make a big difference. It is much wider than the previous light, and also much brighter. This light alone can light up the whole camper without difficulty to the point where the other lights are not even needed.

Sometime however, we are boondocking (a fancy sounding word that just means we are camping in a place that does not have power), or I am trying to read after getting the kids in bed, and I don’t want the full unit lights on. I installed eight battery operated puck lights throughout the camper. These lights don’t provide as much light as the hard wired electric lights, but certainly provide enough lighting for safety and comfort that the kiddos want when camping without access to power. These particular lights can be operated by pushing the individual lights on and off, or can be operated all at once with a remote control. (and yes, much to the entertainment of the kids, there are also several different color settings as well.)
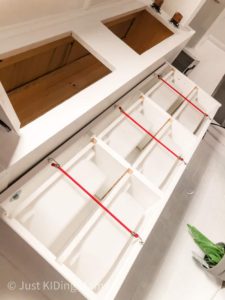 If I thought for one minute I was going to have five people live inside of a 14’ camper, I needed to add more storage and organization. Originally confused as to why the upper cabinets were so small, it allowed me the option to hang the IKEA TROFAST wall organizer below my cabinets. This gives me 6 drawers to stash things. I added eye hooks and bungee cords to keep the drawers in place during transport.
And with that, all of the heavy lifting and moderate construction was finished, all that was left were the final details and décor. Be sure to come see the final details come together over HERE.